In a synchronous environment, you can sketch anywhere in the model: in space, on other sketches, on existing model faces. The plane that is most aligned to the view becomes your default sketch plane. You also can lock a sketch plane to ensure the geometry falls on a specific plane or model face.
(Optional) Display the drawing grid.
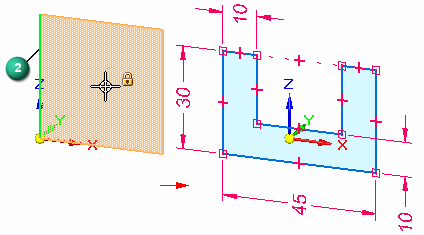
Choose the Relationship Handles command  on the Sketching tab→Relate group or on the Home tab.
Tip:
Relationship handles enable the graphical aids that help you draw with precision by maintaining relationships between lines and points.
Choose a 2D drawing command, such as the Line command.
Do one of the following:
Click anywhere in the graphics window to begin drawing.
The sketch plane is selected for you.
Select and lock a specific sketch plane by doing the following:
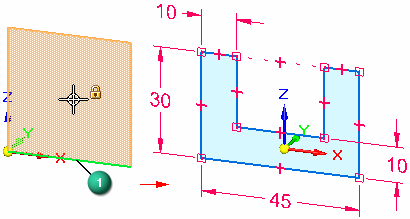
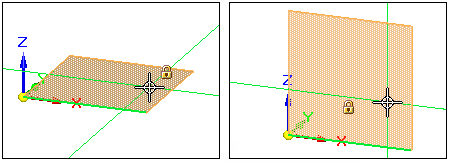
Highlight a base coordinate system plane or a model face or an edge where you want to start the sketch. See the Examples, below.
(Optional) Change the X-axis orientation of the sketch plane by pressing the N (Next), B (Back), or P (Base Plane) keys.
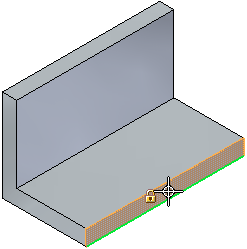
The X-axis is indicated by the green line along the edge of the highlighted plane.
Tip:
The X-axis orientation controls the dimension text alignment for dimensions, and it determines the horizontal and vertical axes for horizontal and vertical relationships.
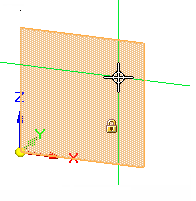
Press F3 or click the lock symbol to lock the plane.
Example:
You can lock one of the three principal planes of the base coordinate system in the center of the graphics window.
Example:
If you want to sketch on an existing model, you can highlight a face or edge, and then lock it.
The sketch plane will remain locked until you unlock it.
Follow the command prompts displayed in PromptBar to draw the 2D element you selected.
Tip:
In synchronous modeling, sketches are generated and managed automatically for you. Observe:
A sketch is created as you draw. It is listed in PathFinder in the Sketches collection.
All connected lines are placed on the same sketch plane.
All geometry added to the same sketch plane or planar face combines into one sketch. Similarly, geometry drawn on two faces generates two sketches.
If you start drawing on a different face, a new sketch is created and added to PathFinder.
To add dimensions and geometric relationships, do the following as needed:
(Automatically add dimensions as you draw) Open IntelliSketch, and on the Auto-Dimension page of the IntelliSketch dialog box, set the Automatically Create Dimensions For New Geometry option.
(Add dimensions and relationships automatically to existing 2D elements) Choose the Relationship Assistant command on the Sketching tab→Relate group or on the Home tab.
(Add dimensions to selected elements) Choose a dimension command, such as Smart Dimension, from the Sketching tab or Home tab.
As you draw, connected lines form a shaded region. You can generate a solid from a region at any time using the Select command.
To learn how, see Construct an extruded protrusion: base feature.
Tip:
If regions get in the way as you sketch, you can use the Disable Regions command to temporarily turn them off. See Enable or disable sketch regions for a sketch.
To draw on a different face or plane, do all of the following:
Unlock the current sketch plane by pressing F3 or clicking the lock symbol in the graphics window.
The lock symbol is removed from the graphics window.
Choose a drawing command.
Repeat step 4.
Tip:
After you lock a sketch plane, you can change to a flat sketch plane rather than the default isometric view using the Sketch View command. When you are finished sketching, you can press Ctrl+I to return to the default isometric view.
To ensure model constraints and dimensions are aligned vertically and horizontally to the current sketch, use the Reposition Origin command to move the sketch plane origin to the nearest keypoint at a corner or edge. See Set sketch plane horizontal and vertical orientation for dimensioning.
To have dimensions snap to the drawing grid as you add them, set the Snap To Grid option in the Grid Options dialog box.
You can use the Zero Origin command to automatically reset the sketch plane origin to the center of the currently locked sketch plane, which is the (0,0,0) coordinate.