When you select certain types of elements in Solid Edge, one or more element handles are displayed. You use handles to modify or manipulate the selected element. For some geometry, you can also use handles to construct new geometry.
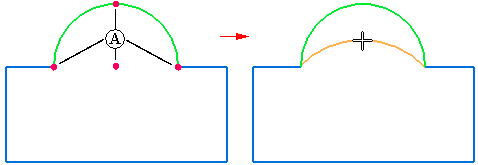
The type of handle displayed depends on the type of element you select. For example, you can use the Select tool to select a 2D wireframe element, such as an arc, and then use the manipulation handles (A) to change the size, shape, or position of the arc.
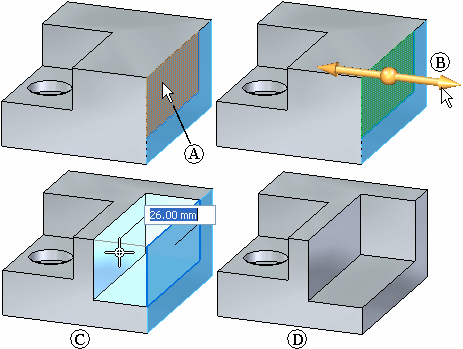
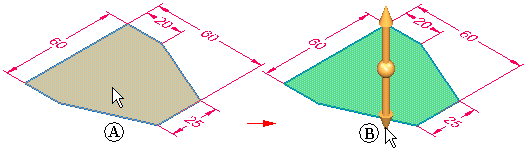
In other cases, you can use a handle to construct new elements. For example, you can use the Select tool to select a sketch region (A), and then use the extrude handle (B) to construct an extruded feature that adds or removes material from the model (C), (D).
In some cases, you can choose a different modification option from QuickBar, which displays a different handle.
2D elements such as lines, arcs, and circles have handles (A) at their keypoints. You can modify the selected element by positioning the cursor over the handle, and then dragging the handle to change the size, shape, or position of the element.
Two types of handles are available for dimensions: a dimension value edit handle and a dimension formatting handle.
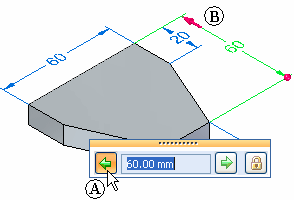
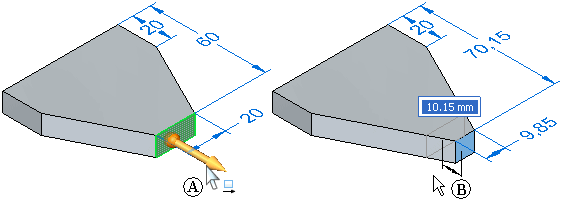
When you click the dimension text on a dimension (1), the value edit handle is displayed (2) near the selected dimension. The dimension value edit handle displays a dialog box for modifying values, plus directional controls.
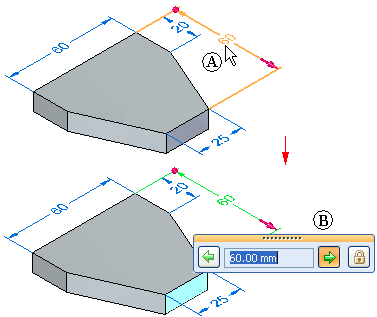
A 3D arrow (1) is displayed on the side of the model which will be modified, and a 3D sphere (2) is displayed on the side of the model that will remain stationary.
To apply the edit to the other side of the model, you can click the arrow button (1) on the value edit handle box, and the 3D terminator display on the dimension also updates (2).
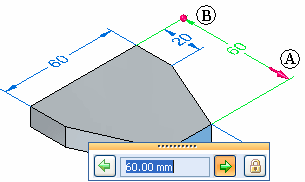
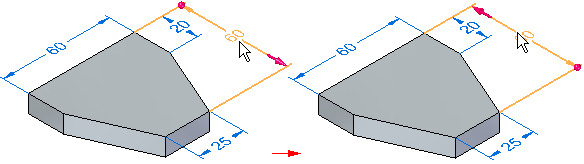
You can also control which side of the model is modified when you select the dimension, by positioning the cursor on the dimension text closest to the side you want to modify. As you move the cursor, the 3D terminator displays updates.
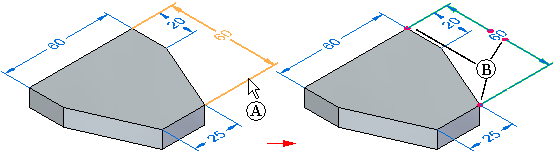
When you click the dimension lines or extension lines on a dimension (A), formatting handles similar to 2D element handles are displayed (B). You can use these to change the length of the dimension and extension lines.
To learn how to modify a model by editing model dimensions, see the Help topic, Edit the model using PMI dimensions.
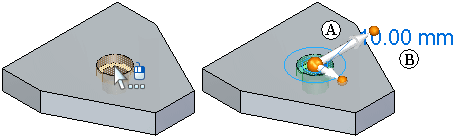
When you click a sketch region (A), the extrude handle (B) is displayed.
When you click either of the arrows on the extrude handle (A), you can construct an extruded feature (B) that adds or removes material from the model.

When the extrude handle (A) is displayed, click the extrude handle origin (C) and drag the handle to the sketch element that defines the axis of revolution (B). The handle changes to a revolve handle.
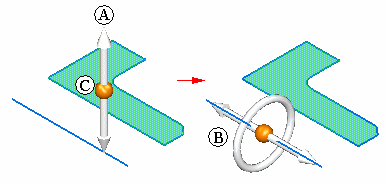
You can also get the revolve handle by doing the following:
When the extrude handle (A) is displayed, you click the Revolve command on command bar (B), to display the revolve handle (C). You use the revolve handle to construct revolved features.
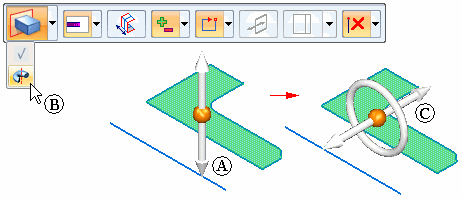
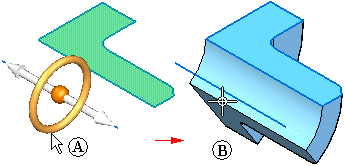
To construct a revolved feature, first drag the revolve handle origin (A) so that the revolve handle is aligned with a sketch element that defines the axis of revolution (B).

Then click the torus (A) on the revolve handle to construct a revolved feature that adds or removes material (B).
When you click one or more model faces or features (A), the steering wheel handle is displayed (B).
You can use the steering wheel to edit the model by moving or rotating the elements in the select set. For example, you can click the primary axis arrow (A) to move the selected face (B). The adjacent faces update their positions automatically.
Note:
When you click a single planar face, only the origin and primary axis of the steering wheel are displayed. When you click multiple faces, the entire steering wheel is displayed.
For more information, see Modifying models using the steering wheel and 2D steering wheel.
Note:
You can also use the steering wheel to move or rotate sketches, sketch elements, reference planes, and face groups.
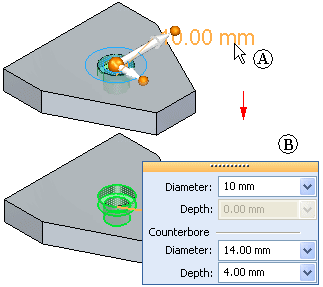
The 2D steering wheel is on-screen handle that looks and behaves similar to the steering wheel. The 2D steering wheel (A) is displayed when you select procedural features, such as holes, dimples, and so forth. It is also displayed when you select a cylindrical face. It often displays in conjunction with the edit definition handle (B). You use the components of the 2D steering wheel to move or rotate selected elements.
When you select a manufactured feature, such as a counterbore hole, two handles are displayed: the 2D steering wheel (A) and the edit definition handle (B).
When you click the edit definition handle (A), the handle is activated, and a dialog box (B) is displayed near the selected text. You can use the options on the dialog box to edit the properties associated with the feature, such as the diameter, depth, and so forth.
Note:
The edit definition handle is also displayed when you select a pattern, round, or thin wall feature, and when you select a part in an assembly.