You can construct extruded features using the Select tool or the Extrude command. Both workflows are explained in this topic.
On the Home tab→Selection group, choose the Select command  .
.
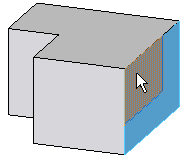
Position the cursor over a sketch region, then click to select it.
The extrude handle (A) appears.
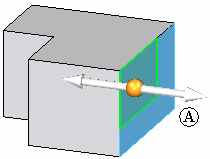
Position the cursor over the Extrude handle, then click to select it.
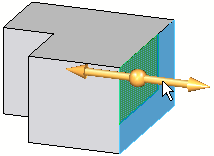
Reposition the cursor to define the direction of the material you want to add or remove.
If you click away from the model body, material is added.
If you click into the model body, material is removed.
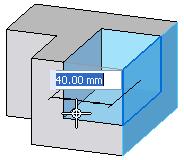
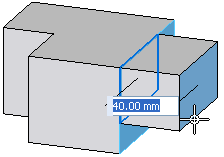
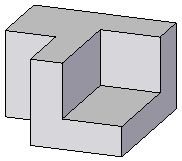
Click to both position and finish the feature.
On the Home tab→Solids group, choose the Extrude command  .
.
On command bar, do one of the following:
Set the Face option, position the cursor within a sketch region, and then click the left mouse button.
Set the Chain option, position the cursor over one of a connected chain of sketch elements, and then click the left mouse button to accept the selection.
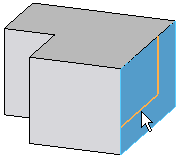
Set the Single option, select one or more connected elements, and then right-click to accept the selection.
Reposition the cursor to define the direction of the material you want to add or remove.
If you click away from the model body, material is added.
If you click into the model body, material is removed.
Click to both position and finish the feature.
Tip:
To define draft and crown parameters for the protrusion or cutout, use the Treatment Step options on the command bar. See the Help topic, Applying draft angle and crowning.