You can construct a revolved feature using the Select tool or the Revolved Extrusion command. Both workflows are explained in this topic.
Choose Home tab→Select group→Select  .
.
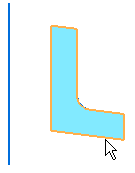
Position the cursor within a sketch region, and when it highlights, click to select it.
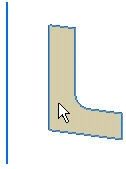
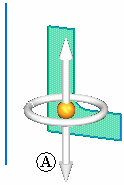
The extrude handle (A) appears.
You can invoke the revolve command by either of the following methods:
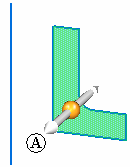
Position the cursor over the Origin knob (A) on the extrude handle, and then click to select it.
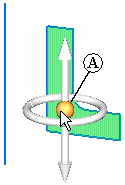
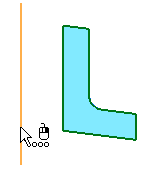
Position the cursor over the sketch element (A) or model edge which you want to use as the axis of revolution. The handle switches to a revolve handle.

Click to drop the revolve handle (B) on the sketch element or model edge.
On the command bar, click the Revolved Extrusion option.
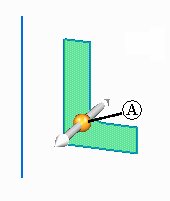
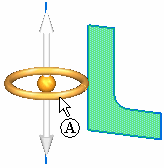
The revolve handle (A) appears.
Position the cursor over the Origin knob (A) on the revolve handle, and then click to select it.
Position the cursor over the sketch element (A) or model edge which you want to use as the axis of revolution, and then click to drop the revolve handle (B) on the sketch element or model edge.
Note:
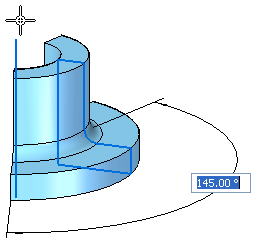
On the revolve command bar, the live section option (A) is on by default. This creates a live section at the completion of the revolve command.
![]()
To specify the feature extent, click the torus (A) on the revolve handle, and then do one of the following:
Move the cursor until the revolved shape is the approximate size you want, and then click to finish the feature.
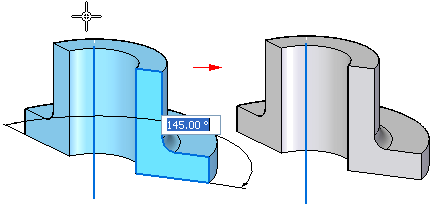
To define the extent precisely, select a keypoint, or type an angular value in the dynamic edit box, then press the Enter key. For values, less than 360 degrees, position the cursor to define the side of the sketch in which you want to construct the feature.
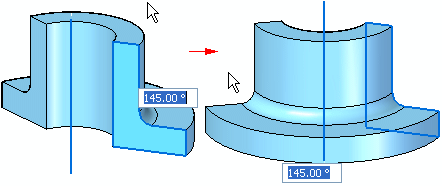
To extend the feature in both directions, click the Symmetric button on the command bar. The extent value is divided equally in both directions. You can also press the Shift key to switch between symmetric and non-symmetric extent.
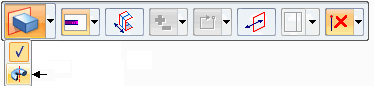
Choose Home tab→Solids group→Revolved Extrusion  .
.
Do one of the following:
On the command bar, set the Face option, position the cursor within a sketch region, and when it highlights click to select it.
On the command bar, set the Chain option, position the cursor over one of a connected chain of sketch elements, then click to select them.
To accept the selection, click the Accept button on the command bar or right-click.
Define the axis of revolution by selecting a linear sketch element or linear model edge.
On the revolve command bar, the live section option (A) is on by default. This creates a live section at the completion of the revolve command.
![]()
To specify the feature extent, do one of the following:
Move the cursor until the revolved shape is the approximate size you want, and then click.
To define the extent precisely, select a keypoint, or type an angular value in the dynamic edit box, then press the Enter key. For values, less than 360 degrees, position the cursor to define the side of the sketch in which you want to construct the feature.
To extend the feature in both directions, click the Symmetric button ![]() on the command bar. The extent value is divided equally in both directions. You can also press the Shift key to switch between symmetric and non-symmetric extent.
on the command bar. The extent value is divided equally in both directions. You can also press the Shift key to switch between symmetric and non-symmetric extent.
Complete the feature by clicking in free space.
Tip:
When constructing a base feature, the sketch elements must form a closed area.