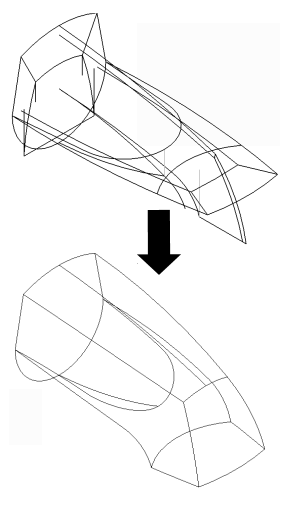
Create control drawings.
Definition: Control Drawings are 2D drawing views defining the top, side, and end views. Typically one or two views dominate (define the majority of the shape).
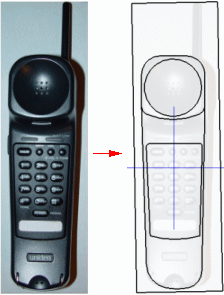
Part environment: You can create control drawings directly by drawing on reference planes. Pierce points aid in connecting curves.
Draft environment: You can create control drawings in 2D, then use Copy and Paste to transfer the 2D elements from Draft into Part. Also, you can use Create 3D or import sketches.
Tip:
While drawing any sketch element in either the Part or Draft environment, use Line Color to help distinguish edges and construction edges in the control drawing.

Draw all character curves.
Do not over draw. Do not model rounds, ribs, or features best created with solid features.
Capture design intent. Add dimensions and constraints.
Create simple B-splines with few Edit Points.
Make sure view sketches register.
Build edge continuity into your sketches.
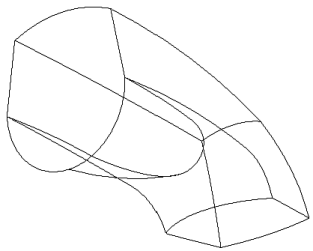
Use 2D geometry to develop 3D curves.
Project curves from control drawings.
You may need some construction surfaces to generate 3D curves. This is very important in reducing modeling steps.
3D curves give simplified control over edges.
Capture your design intent by using control drawings.
Without 3D curves, character edges may not be captured.
Lack of 3D edges eliminates design intent and adds more modeling.
With 3D curves, design intent is preserved and modeling is reduced.
You can easily change the shape by altering the character curves for the respective view.
Creating 3D edges guarantees an accurate design and reduces modeling steps.
Making changes to the 3D curve is simple. Edit the character curve in the control drawing.
Repeat the process until all 3D curves are created
A wireframe representation of the model should result.
All 3D curves should be touching.
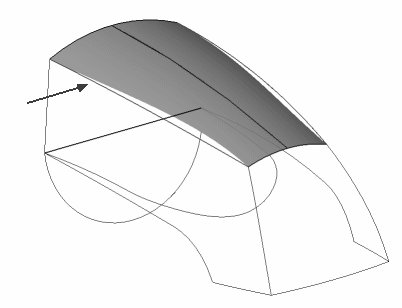
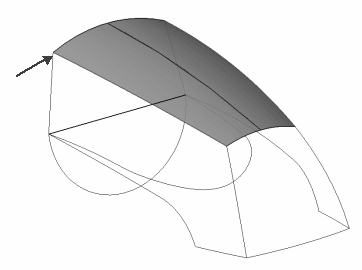
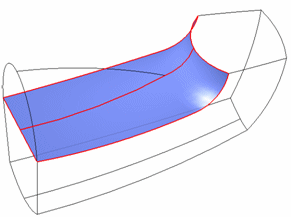
Use 3D curves to develop surfaces.
BlueSurf command.
Inputs are guides and sections.
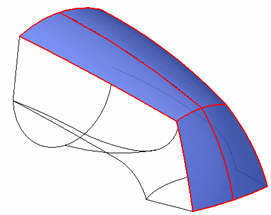
Swept command.
Inputs are guides and sections.
Bounded command
N-sided patch.

Create a solid and add appropriate solid based features.
Stitch together surfaces
Add solid-based features
Thinwall
Stiffening Rib
Hole
Round
Web network
Lip
Tweak.
Analyze edge continuity using:
Curvature Comb
Zebra Stripes
Edit character curves
Edit tangent vectors
Edit vertex mapping