You can create global reference planes using the commands on the Home tab, or you can create local reference planes using the reference plane options on the command bar when constructing a feature.
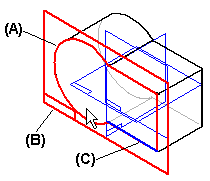
When you create a new reference plane based on an existing reference plane (A), the x-axis orientation of the new reference plane (B) matches the x-axis orientation of the existing reference plane.

When you define a new reference plane based on a part face, you can quickly create a new reference plane where the x-axis orientation and origin is determined automatically or you can define the x-axis orientation and origin yourself.
To quickly create a new reference plane where the x-axis orientation and origin is determined automatically you can use the following options:
Coincident Plane
Parallel Plane
When you use these options to create a new reference plane based on a part face (A), the x-axis orientation (B) of the new reference plane is automatically defined using a linear edge (C) on the part face.

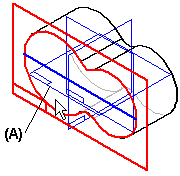
If the face you select does not have any linear edges, the x-axis orientation of the new reference plane is defined using one of the default reference planes (A).

To create a new reference plane where you control the x-axis orientation and origin, you can use the following options:
Coincident Plane By Axis
Angled Plane
Perpendicular Plane
Plane Normal To Curve
Plane By 3 Points
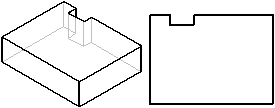
For example, suppose you wanted to define a new reference plane relative to the top face of the part , and you want it to be oriented as shown on the right side.

Using the Coincident Plane By Axis option, you can do this by selecting the top face (A) as the planar face, then the bottom edge (B) as the x axis of the new reference plane. Then click near the left end of the plane (C) to define the origin. Notice that when you position your mouse near the left end, a dynamic representation of the new reference plane is displayed.
