Note:
Cutting plane lines are used to define section views.
Choose Home tab→Drawing Views group→Cutting Plane  .
.
Click a part view.
Any part view can be selected as the source of the section view, including auxiliary and detail views.
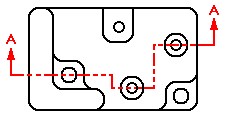
Draw the cutting plane.
(See Tips, below.)
When you are finished drawing the cutting plane, on the ribbon, click Close Cutting Plane  .
.
Click to define the section view direction.
Tip:
You can create a cutting plane line on a part view or a 2D view, but only a part view can be used to create a section view.
If you draw the cutting plane line so that it extends beyond the cropping boundary of a detail view, then the geometry outside the detail view, to the extent of the cutting plane, will be included in the section view. If you draw the cutting plane line so that it is completely contained within the detail view, then only that geometry, to the extent of the cutting plane, will be included in the section view.
A cutting plane can consist of one or more elements. You can include both lines and arcs in a cutting plane. If you create a cutting plane that consists of multiple elements, the elements must meet the following requirements:
The elements must meet at their endpoints.
The elements cannot form a closed region or have loops.
The elements cannot cross each other.
Any arcs in the cutting plane must be connected to a line at each end of the arc.
You can move the cutting plane's caption text.
You can double-click a cutting plane line to edit it, or right-click on it and select Properties from the shortcut menu. The cutting plane line style and position of the cutting plane direction arrows can be adjusted.